Fermented Foods Revival: 6 Easy Recipes for Gut Health in 2026
Anúncios
The Fermented Foods Revival: 6 Easy Recipes to Incorporate Gut-Healthy Options into Your US Diet in 2026
Welcome to the era of the fermented foods revival! In 2026, health-conscious individuals across the United States are increasingly turning to ancient traditions to boost their well-being. The focus? Gut health. Our digestive system, often called our ‘second brain,’ plays a pivotal role in everything from immunity and mood to nutrient absorption. And at the heart of a healthy gut lies a diverse microbiome, nurtured by probiotic-rich foods. This growing awareness has fueled a significant interest in fermented foods, moving them from niche health stores to mainstream kitchens.
Anúncios
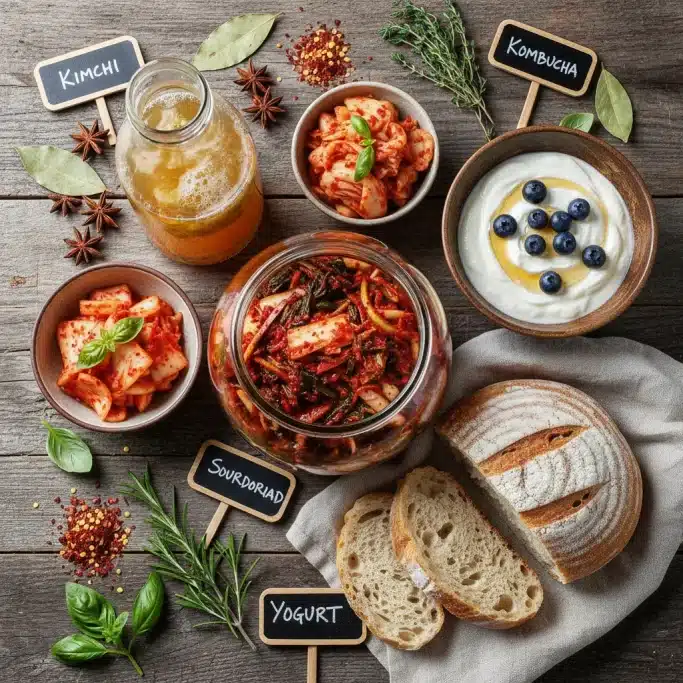
But what exactly are fermented foods, and why are they experiencing such a powerful resurgence? Simply put, fermentation is a metabolic process where microorganisms like yeast and bacteria convert carbohydrates into alcohol or organic acids. This process not only preserves food but also enhances its nutritional value, creates unique flavors, and, most importantly, produces beneficial probiotics that are essential for a thriving gut. From tangy kimchi to fizzy kombucha, these culinary delights are more than just a passing trend; they are a cornerstone of a healthy lifestyle that’s here to stay.
For many, the idea of fermenting food at home can seem daunting, conjuring images of complex processes and potential pitfalls. However, the reality is far simpler and incredibly rewarding. Incorporating fermented foods recipes into your daily routine doesn’t require specialized equipment or advanced culinary skills. With a few basic ingredients and a little patience, you can transform your kitchen into a hub of probiotic power, creating delicious and nourishing foods that will make your gut sing.
Anúncios
In this comprehensive guide, we’ll dive deep into the world of fermented foods recipes, specifically tailored for the US diet in 2026. We’ll explore the science behind their benefits, debunk common myths, and provide you with 6 easy, step-by-step recipes that you can confidently make at home. Get ready to embark on a flavorful journey that will revolutionize your gut health and overall well-being. Let’s embrace the fermented foods revival!
The Science Behind the Fermented Foods Revival: Why Your Gut Craves Them
Before we jump into the delicious world of fermented foods recipes, let’s briefly understand why these ancient foods are so beneficial. The human gut is home to trillions of microorganisms, collectively known as the gut microbiome. This intricate ecosystem plays a crucial role in digestion, vitamin synthesis, immune system regulation, and even mental health. A balanced and diverse microbiome is key to optimal health, and fermented foods are a powerful tool for achieving this balance.
Probiotics: The Gut’s Best Friends
The primary benefit of fermented foods comes from their rich probiotic content. Probiotics are live microorganisms that, when consumed in adequate amounts, confer a health benefit on the host. These beneficial bacteria help to:
- Improve Digestion: Probiotics can help break down food, especially lactose, and may alleviate symptoms of irritable bowel syndrome (IBS), bloating, and constipation.
- Boost Immunity: A significant portion of our immune system resides in the gut. Probiotics help strengthen the gut barrier, preventing harmful substances from entering the bloodstream, and modulate immune responses.
- Enhance Nutrient Absorption: Certain bacteria produce enzymes that help us absorb more nutrients from our food, such as B vitamins and vitamin K.
- Support Mental Health: Emerging research suggests a strong connection between gut health and brain function, often referred to as the gut-brain axis. Probiotics may influence mood, reduce anxiety, and improve cognitive function.
- Detoxification: Some probiotic strains can aid in the detoxification process by breaking down harmful compounds.
Prebiotics: Fuel for the Good Bacteria
While probiotics introduce beneficial bacteria, prebiotics are non-digestible fiber compounds that act as food for these good bacteria, helping them to thrive. Many fermented foods, especially those made with fibrous vegetables, contain both probiotics and prebiotics, creating a synergistic effect that maximizes gut health benefits. This powerful combination makes fermented foods recipes incredibly effective for gut health.
Enhanced Bioavailability and Nutrient Content
Fermentation doesn’t just add probiotics; it can also increase the bioavailability of nutrients already present in the food. The fermentation process breaks down complex compounds, making vitamins and minerals easier for your body to absorb. In some cases, it can even synthesize new vitamins, such as B vitamins. This means that your homemade fermented foods recipes are often more nutritious than their unfermented counterparts.
Common Myths About Fermented Foods Debunked
Despite the growing popularity of the fermented foods revival, several myths persist that can deter people from trying to make them at home. Let’s clear the air:
- Myth: Fermenting at home is dangerous.
Reality: While proper hygiene is essential, home fermentation is generally very safe. The acidic environment created by lactic acid bacteria inhibits the growth of most harmful pathogens. Following reliable fermented foods recipes and maintaining cleanliness are key. - Myth: Fermented foods are difficult and time-consuming to make.
Reality: Many fermented foods, especially the ones we’ll explore, are surprisingly simple and require minimal active time. Most of the work is done by the microorganisms themselves, with you just needing to set them up. - Myth: All fermented foods taste sour.
Reality: While many do have a tangy profile due to the acids produced, the flavor spectrum is vast. From the umami of miso to the subtle sweetness of milk kefir, there’s a fermented food for every palate. - Myth: You need special equipment.
Reality: For many basic ferments, you only need glass jars, lids, and common kitchen items. While airlocks and specialized crocks can be helpful, they are not always necessary for beginners.
Now that we’ve dispelled some common misconceptions and understood the incredible benefits, let’s get to the exciting part: the fermented foods recipes!
6 Easy Fermented Foods Recipes for Your US Diet in 2026
These recipes are designed to be beginner-friendly, requiring minimal fuss but delivering maximum flavor and probiotic punch. Get ready to transform your kitchen into a healthy haven!
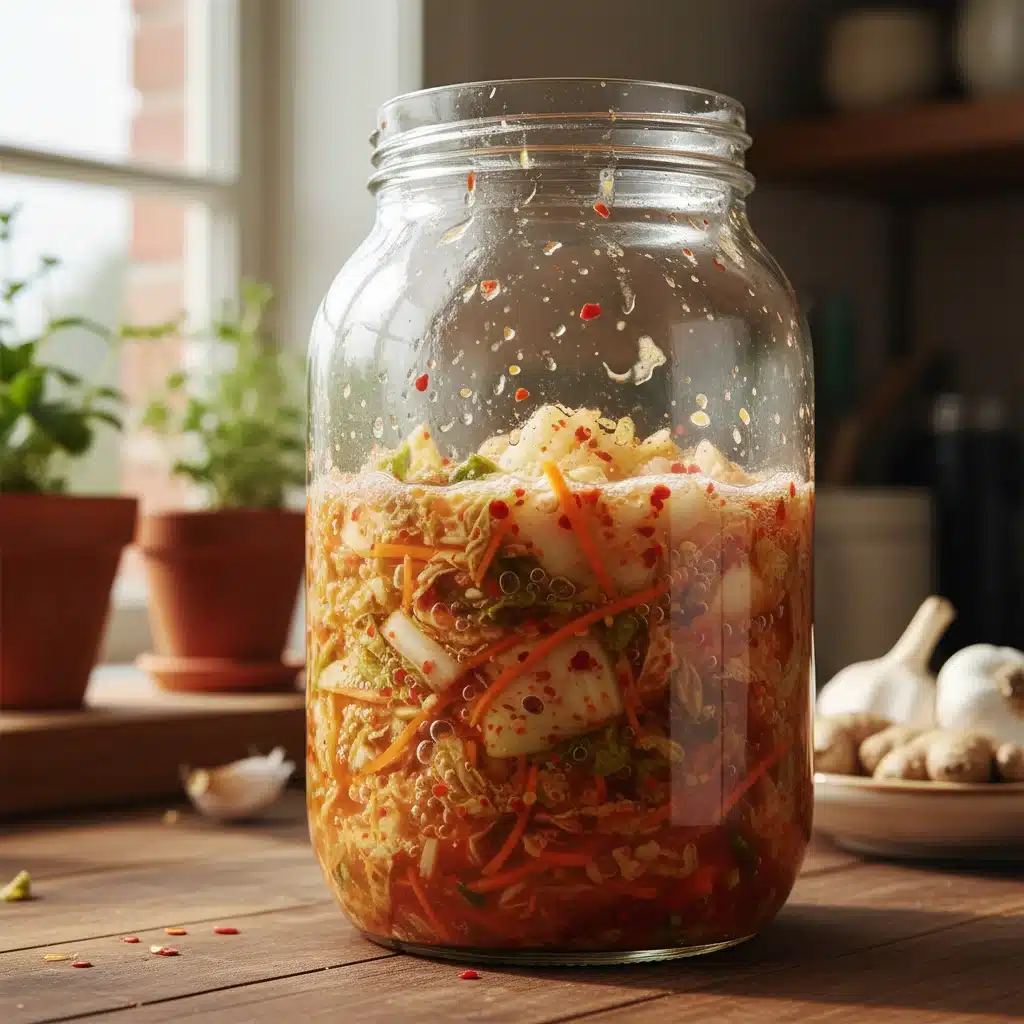
1. Classic Kimchi: The Spicy Korean Staple
Kimchi is a traditional Korean side dish made from salted and fermented vegetables, most commonly napa cabbage and Korean radish, with a variety of seasonings including gochugaru (chili powder), garlic, ginger, and scallions. It’s renowned for its bold, spicy, and umami-rich flavor, and its incredible probiotic benefits.
Ingredients:
- 1 large head napa cabbage (about 3-4 lbs)
- 1/2 cup sea salt (non-iodized)
- 1 cup filtered water (for brine)
- 1/2 cup gochugaru (Korean chili flakes) – adjust to taste
- 1/4 cup fish sauce (or tamari for vegan)
- 1/4 cup minced garlic
- 2 tbsp grated fresh ginger
- 1 tbsp sugar (or maple syrup)
- 1 cup shredded daikon radish
- 6-8 green onions, chopped into 1-inch pieces
Instructions:
- Prepare Cabbage: Quarter the cabbage lengthwise and chop into 2-inch pieces. Place in a large bowl, sprinkle with sea salt, and toss to coat. Add 1 cup filtered water, ensuring the cabbage is submerged. Place a plate on top with a weight (like a jar of water) to keep it submerged. Let sit for 2-3 hours, or until cabbage is softened.
- Rinse and Drain: Drain the cabbage, reserving the brine. Rinse the cabbage thoroughly under cold water several times to remove excess salt. Squeeze out as much water as possible.
- Make Paste: In a separate bowl, combine gochugaru, fish sauce, minced garlic, grated ginger, and sugar. Mix well to form a paste.
- Combine: Add the rinsed cabbage, shredded daikon, and green onions to the paste. Using gloved hands (the chili can irritate skin), thoroughly mix everything together, ensuring the paste coats all the vegetables.
- Pack Jars: Tightly pack the kimchi mixture into clean glass jars, pressing down firmly to remove air pockets. Leave about 1-2 inches of headspace from the top. Pour any remaining brine over the kimchi until vegetables are submerged. If there isn’t enough brine, mix a little more salt with filtered water and add.
- Ferment: Loosely cap the jars (or use an airlock lid). Place the jars on a tray (to catch any overflow) at room temperature (65-75°F / 18-24°C) for 2-5 days. "Burp" the jars daily by briefly opening the lid to release pressure. Taste daily; once it reaches your desired tanginess, transfer to the refrigerator.
Shelf Life: Kimchi can last for several months in the refrigerator, continuing to ferment slowly and develop deeper flavors.
2. Homemade Kombucha: The Fizzy Probiotic Tea
Kombucha is a fermented, lightly effervescent, sweetened black or green tea drink commonly consumed for its supposed health benefits. It’s made by fermenting tea using a "SCOBY" (Symbiotic Culture of Bacteria and Yeast).
Ingredients:
- 1 gallon filtered water
- 8 black or green tea bags (or 8 tsp loose leaf tea)
- 1 cup granulated sugar
- 2 cups unpasteurized, plain kombucha (from a previous batch or store-bought, without flavorings)
- 1 SCOBY (Symbiotic Culture of Bacteria and Yeast)
Instructions:
- Brew Tea: Bring 2 cups of filtered water to a boil. Remove from heat, add tea bags (or loose leaf in a tea ball), and steep for 5-7 minutes. Remove tea.
- Dissolve Sugar: Stir in the sugar until completely dissolved.
- Cool Tea: Add the remaining 10 cups of cold filtered water to the sweet tea. It’s crucial that the tea cools completely to room temperature (below 85°F / 29°C) before adding the SCOBY and starter tea, otherwise, you could kill the culture.
- Combine Ingredients: Pour the cooled sweet tea into a large, clean glass gallon jar. Gently add the SCOBY and the 2 cups of starter kombucha.
- Cover and Ferment: Cover the jar with a breathable cloth (like cheesecloth or a coffee filter) secured with a rubber band. This allows air circulation while keeping out contaminants. Place the jar in a quiet spot away from direct sunlight at room temperature (68-78°F / 20-25°C) for 7-14 days.
- Taste and Bottle (First Fermentation): After 7 days, begin tasting your kombucha daily using a clean straw. It should be slightly tart and less sweet. Once it reaches your desired flavor, it’s ready for bottling.
- Second Fermentation (Optional for Fizz): For fizz, remove the SCOBY and about 2 cups of the finished kombucha (this will be your starter tea for the next batch). Pour the remaining kombucha into airtight flip-top bottles, adding flavorings like fruit juice, fresh fruit, or ginger. Leave 1-2 inches of headspace. Seal tightly and ferment at room temperature for another 2-4 days. "Burp" daily to release pressure.
- Refrigerate: Once sufficiently fizzy, transfer to the refrigerator to slow down fermentation.
Shelf Life: Kombucha can last for several weeks to months in the refrigerator.
3. Quick Pickled Vegetables: Easy Fermentation for Beginners
While technically a "quick ferment" and not as deeply probiotic as longer ferments, this method offers a fantastic introduction to the tangy world of fermented flavors and still provides some beneficial bacteria, especially if left for a few days at room temperature.
Ingredients:
- 2 lbs mixed vegetables (cucumbers, carrots, bell peppers, green beans, radishes, cauliflower florets)
- 4 cups filtered water
- 2 tbsp sea salt (non-iodized)
- Optional flavorings: garlic cloves, dill sprigs, mustard seeds, peppercorns, chili flakes
Instructions:
- Prepare Vegetables: Wash and chop vegetables into desired sizes. Pack them tightly into clean glass jars. Add any optional flavorings.
- Make Brine: In a bowl, dissolve sea salt in filtered water to create a 2% brine (2 tbsp salt per 4 cups water).
- Brine and Submerge: Pour the brine over the vegetables, ensuring they are completely submerged. Use a fermentation weight or a small, clean jar filled with water to keep vegetables below the brine. Leave at least 1 inch of headspace.
- Ferment: Loosely cap the jars (or use an airlock lid). Place at room temperature (65-75°F / 18-24°C) for 3-7 days. Taste daily after day 3. They will become progressively more sour and develop a pleasant tang.
- Refrigerate: Once they reach your desired sourness, transfer to the refrigerator.
Shelf Life: Quick pickled vegetables last for several weeks in the refrigerator.
4. Sourdough Starter & Bread: The Ultimate Artisan Ferment
Creating a sourdough starter is a journey, but it’s one of the most rewarding fermented foods recipes you can undertake. It uses wild yeasts and bacteria from the environment to leaven bread, resulting in a distinct tangy flavor and chewy texture.
Ingredients for Starter:
- Unbleached all-purpose or bread flour
- Filtered water
Instructions for Starter (7 Days):
- Day 1: In a clean glass jar, mix 50g unbleached flour with 50g filtered water. Mix well until no dry spots remain. Cover loosely with a lid or plastic wrap and leave at room temperature (70-75°F / 21-24°C) for 24 hours.
- Day 2: You might see some small bubbles. Discard all but 50g of the starter. Feed it with 50g flour and 50g filtered water. Mix, cover, and let sit for 24 hours.
- Day 3-7: Repeat Day 2. By day 4 or 5, you should see more consistent activity: bubbles, a pleasant sour smell, and the starter doubling in size a few hours after feeding. Once it consistently doubles within 4-8 hours after feeding, it’s active and ready to bake with.
Basic Sourdough Bread Recipe (Requires active starter):
- 100g active sourdough starter
- 350g filtered water
- 500g strong bread flour
- 10g sea salt
Instructions for Bread:
- Autolyse (Optional but Recommended): In a large bowl, mix starter, water, and flour until just combined. Cover and let sit for 30 minutes to 1 hour.
- Add Salt: Add the salt and mix thoroughly, kneading for a few minutes until it’s incorporated.
- Bulk Fermentation (Stretch and Folds): Over the next 3-4 hours, perform "stretch and folds" every 30 minutes to 1 hour. Gently stretch a portion of the dough up and fold it over itself. Rotate the bowl and repeat 3-4 times. Cover between folds. The dough will become stronger and more elastic.
- Shape: Gently turn the dough out onto a lightly floured surface. Shape it into a round or oval.
- Proof (Cold Fermentation): Place the shaped dough into a floured banneton (proofing basket) or a bowl lined with a floured cloth. Cover with plastic wrap and refrigerate for 12-18 hours. This slow cold proof develops flavor.
- Bake: Preheat your oven to 475°F (245°C) with a Dutch oven inside for at least 30 minutes. Carefully remove the hot Dutch oven, invert the dough into it, score the top with a sharp knife or razor blade. Cover and bake for 20 minutes. Remove lid, reduce heat to 450°F (230°C), and bake for another 25-35 minutes, or until deeply golden brown.
- Cool: Transfer to a wire rack and cool completely before slicing (at least 1-2 hours) for best texture.
Shelf Life: Sourdough bread is best consumed within a few days; starter can live indefinitely with regular feeding.

5. Fermented Hot Sauce: A Flavorful Kick
Fermenting hot peppers before blending them into a sauce adds incredible depth of flavor, a probiotic boost, and a more complex tang than vinegar-based sauces. This is one of the most exciting fermented foods recipes for those who love spice.
Ingredients:
- 1 lb fresh hot peppers (e.g., jalapeños, serranos, habaneros), stemmed and roughly chopped
- 2-3 cloves garlic, peeled
- 1-inch piece ginger, peeled and sliced (optional)
- 2% brine: 2 tbsp sea salt (non-iodized) per 4 cups filtered water (adjust amount based on pepper volume)
Instructions:
- Prepare Peppers: Wearing gloves, wash and roughly chop the peppers. You can remove seeds and membranes for less heat, or leave them in for extra spice.
- Pack Jar: Place chopped peppers, garlic, and ginger (if using) into a clean glass jar.
- Make Brine: Dissolve sea salt in filtered water to create a 2% brine.
- Brine and Submerge: Pour the brine over the peppers, ensuring they are completely submerged. Use a fermentation weight or a small, clean jar to keep them under the brine. Leave 1-2 inches of headspace.
- Ferment: Loosely cap the jar (or use an airlock). Place at room temperature (65-75°F / 18-24°C) for 5-14 days. You’ll see bubbles and the brine may become cloudy. Taste periodically after 5 days.
- Blend: Once fermented to your liking, drain the peppers, reserving the brine. Blend the fermented peppers, garlic, and ginger in a blender or food processor until smooth. Add reserved brine, a tablespoon at a time, until you reach your desired consistency.
- Strain (Optional): For a smoother sauce, push the blended mixture through a fine-mesh sieve, discarding solids.
- Bottle and Refrigerate: Pour the hot sauce into clean bottles and store in the refrigerator.
Shelf Life: Fermented hot sauce can last several months in the refrigerator.
6. Simple Sauerkraut: The Classic German Ferment
Sauerkraut, meaning "sour cabbage" in German, is finely shredded cabbage that has been fermented by various lactic acid bacteria. It’s incredibly simple to make and a fantastic source of probiotics.
Ingredients:
- 1 medium head green cabbage (about 3-4 lbs)
- 2 tbsp sea salt (non-iodized)
- Optional flavorings: caraway seeds, juniper berries, shredded carrots, apple slices
Instructions:
- Prepare Cabbage: Remove the outer leaves of the cabbage (reserve one or two for later). Quarter the cabbage, remove the core, and finely shred it using a knife, mandoline, or food processor.
- Salt and Massage: Place the shredded cabbage in a large bowl. Sprinkle with sea salt. Begin massaging and squeezing the cabbage with clean hands for 5-10 minutes. The salt will draw out water from the cabbage, creating its own brine. Continue until a significant amount of liquid has accumulated at the bottom of the bowl.
- Pack Jar: Add any optional flavorings to the cabbage. Tightly pack the salted cabbage and its brine into a clean glass jar. Press down firmly to eliminate air pockets.
- Submerge: Ensure the cabbage is completely submerged in its own brine. If not, you can place one of the reserved outer cabbage leaves on top, then use a fermentation weight or a small, clean jar to hold everything under the liquid.
- Ferment: Loosely cap the jar (or use an airlock). Place on a tray at room temperature (65-75°F / 18-24°C) for 1-3 weeks. Taste periodically after one week. The longer it ferments, the tangier it will become.
- Refrigerate: Once it reaches your desired flavor and texture, transfer to the refrigerator.
Shelf Life: Sauerkraut can last for several months in the refrigerator, continuing to develop flavor.
Tips for Successful Home Fermentation
To ensure your fermented foods recipes are always a success and your gut gets the best possible boost, keep these tips in mind:
- Use Cleanliness, Not Sterility: While you don’t need a sterile environment, always use clean jars, utensils, and hands.
- Filtered Water is Best: Chlorine in tap water can inhibit beneficial bacteria. Use filtered or non-chlorinated water whenever possible.
- Non-Iodized Salt: Iodine can also interfere with fermentation. Stick to sea salt, kosher salt, or pickling salt.
- Keep it Submerged: For vegetable ferments, ensuring the vegetables stay under the brine is crucial to prevent mold growth. Fermentation weights are your friend.
- Room Temperature Matters: Most ferments thrive at consistent room temperatures (65-75°F / 18-24°C). Too cold slows fermentation, too hot can lead to off-flavors or spoilage.
- "Burp" Your Jars: Fermentation produces gases. If using tightly sealed jars, briefly open them daily to release pressure.
- Don’t Fear the Funk: A healthy ferment will have a pleasant, tangy, slightly sour smell. If you see fuzzy mold (not just kahm yeast, which is a thin white film that can be scraped off), or it smells genuinely putrid, discard it.
- Start Small: Don’t try to make huge batches initially. Master a few small batches of fermented foods recipes before scaling up.
- Label and Date: Always label your jars with the contents and date of creation.
Integrating Fermented Foods into Your US Diet in 2026
Now that you’ve mastered these fermented foods recipes, how do you make them a regular part of your diet? The beauty of fermented foods is their versatility:
- Kimchi: Serve as a side dish with almost any meal, add to fried rice, stir-fries, stews, or even as a topping for hot dogs and burgers.
- Kombucha: Enjoy as a refreshing beverage, use as a base for mocktails, or blend into smoothies.
- Pickled Vegetables: A crunchy addition to salads, sandwiches, tacos, or simply as a snack.
- Sourdough Bread: The perfect base for avocado toast, sandwiches, or alongside soups and stews.
- Fermented Hot Sauce: Drizzle on eggs, pizza, tacos, grilled meats, or mix into dressings.
- Sauerkraut: A classic pairing with sausages, bratwurst, reuben sandwiches, or as a tangy component in salads.
Aim to incorporate a small serving (e.g., 1/4 to 1/2 cup) of diverse fermented foods recipes daily. This consistent intake will help maintain a healthy and vibrant gut microbiome, contributing to your overall wellness in 2026 and beyond.
Conclusion: Embrace the Fermented Foods Revival for a Healthier You
The fermented foods revival is more than just a culinary trend; it’s a movement towards rediscovering traditional wisdom for modern health. By making your own fermented foods recipes at home, you gain control over the ingredients, ensure the presence of live probiotics, and save money, all while enjoying incredibly delicious and unique flavors.
The six easy recipes provided here – from the spicy kick of kimchi to the tangy comfort of sourdough and the refreshing fizz of kombucha – offer a perfect starting point for anyone looking to enhance their gut health. Remember, consistency is key. Regular consumption of these probiotic powerhouses will help foster a thriving gut microbiome, leading to improved digestion, boosted immunity, and enhanced overall wellness.
So, gather your ingredients, embrace the process, and become a part of the fermented foods revival. Your gut will thank you!


")