Blanching and Shocking: 2026 Techniques for Vibrant Vegetables (PRACTICAL SOLUTIONS)
Anúncios
In the vast and ever-evolving world of culinary arts, certain fundamental techniques stand the test of time, proving indispensable for both professional chefs and home cooks alike. Among these, the duo of blanching and shocking vegetables holds a paramount position. These techniques are not merely about cooking; they are about transforming, preserving, and enhancing the natural beauty and nutritional integrity of your produce. As we look towards 2026 and beyond, understanding and mastering these methods becomes even more crucial in an era focused on health, efficiency, and vibrant presentation.
Many people might wonder, what exactly are blanching and shocking vegetables? Simply put, blanching involves briefly submerging food, typically vegetables, into boiling water, followed immediately by shocking, which means plunging them into an ice bath to halt the cooking process. This seemingly simple two-step process yields a multitude of benefits, from intensifying color and improving texture to loosening skins and preserving nutrients. It’s a culinary superpower that every cook should wield with confidence.
Anúncios
This comprehensive guide will delve deep into the intricacies of blanching and shocking vegetables, exploring their scientific basis, practical applications, and advanced techniques. We’ll provide you with 2026 techniques and practical solutions, ensuring that your vegetables are always at their peak. Whether you’re aiming for perfectly crisp green beans, bright broccoli, or easily peeled tomatoes, this article is your ultimate resource.
The Fundamental Science Behind Blanching and Shocking Vegetables
To truly appreciate the power of blanching and shocking vegetables, it’s helpful to understand the science at play. When vegetables are blanched, the high heat of the boiling water causes several immediate changes:
Anúncios
- Enzyme Inactivation: Vegetables contain enzymes that, over time, can cause discoloration, flavor changes, and nutrient degradation. Blanching denatures these enzymes, effectively stopping their activity. This is why blanched vegetables retain their vibrant color and fresh taste longer, especially when frozen.
- Color Enhancement: The heat from blanching helps to set the chlorophyll in green vegetables, making their colors more vivid and appealing. It pushes out the air trapped in the plant tissues, which can otherwise dull the color.
- Texture Improvement: Blanching slightly softens the cell walls of vegetables, leading to a more tender-crisp texture. It also helps to remove some of the raw, sometimes bitter, flavors.
- Cleaning and Pest Removal: The boiling water can help to clean the surface of vegetables, removing dirt, pesticides, and even small insects.
Immediately following the blanching process, the shocking step is equally vital. Plunging the hot vegetables into an ice bath rapidly cools them down, serving several critical functions:
- Halting the Cooking Process: This is perhaps the most crucial role of shocking. Without it, residual heat would continue to cook the vegetables, leading to an overcooked, mushy texture and dull color. The ice bath instantly stops this carry-over cooking.
- Preserving Color: By rapidly cooling, shocking locks in the vibrant colors that blanching has enhanced.
- Maintaining Crispness: The sudden temperature drop helps to firm up the vegetable’s texture, ensuring they remain crisp and not soggy.
Understanding these scientific principles empowers you to execute blanching and shocking vegetables with precision and confidence, consistently achieving superior results.
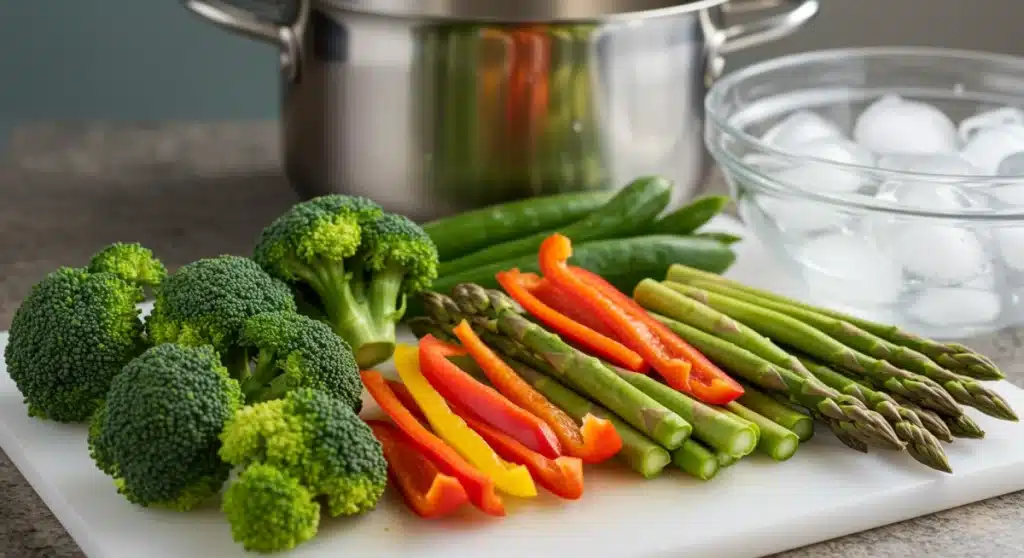
Essential Equipment for Perfect Blanching and Shocking
While the process of blanching and shocking vegetables is straightforward, having the right tools can make all the difference in efficiency and outcome. Here’s what you’ll need:
- Large Pot with Lid: Choose a pot large enough to hold plenty of water and allow vegetables to move freely. A lid helps bring water to a boil faster.
- Slotted Spoon or Spider Skimmer: Essential for safely transferring vegetables from boiling water to the ice bath.
- Large Bowl for Ice Bath: This bowl should be large enough to accommodate the blanched vegetables and a generous amount of ice water, ensuring rapid cooling.
- Ice: Lots of it! The colder the ice bath, the more effective the shocking process will be.
- Colander: For draining blanched vegetables before shocking, and for draining shocked vegetables afterward.
- Timer: Precision is key in blanching, as even a few seconds can impact the final texture.
Having these items ready before you begin will streamline the process and allow you to focus on timing and technique, ensuring your blanching and shocking vegetables efforts are always successful.
Step-by-Step Guide to Blanching and Shocking Vegetables (2026 Techniques)
Let’s break down the core process of blanching and shocking vegetables into actionable, easy-to-follow steps. These 2026 techniques emphasize efficiency, optimal results, and adaptability for various vegetable types.
Step 1: Prepare Your Vegetables
Before anything else, thoroughly wash and prepare your vegetables. This includes trimming stems, peeling (if necessary, like for carrots or potatoes), and cutting them into uniform sizes. Uniformity is crucial for even cooking during blanching. For example, if you’re blanching broccoli, ensure all florets are roughly the same size.
Step 2: Set Up Your Ice Bath
This is a critical preparatory step often overlooked. Fill your large bowl with plenty of ice and cold water. The ratio should be roughly 1:1 ice to water. The water needs to be as cold as possible to effectively halt the cooking process. Have it ready right next to your stovetop.
Step 3: Bring Water to a Rolling Boil
Fill your large pot with water and bring it to a rolling boil. Season the water generously with salt. Just like pasta water, salted water enhances the flavor of the vegetables. A general rule of thumb is about 1-2 tablespoons of salt per gallon of water. Ensure there’s enough water to completely submerge the vegetables without significantly dropping the water temperature.
Step 4: Blanch the Vegetables
Carefully add your prepared vegetables to the boiling water. Do not overcrowd the pot, as this will lower the water temperature and lead to uneven cooking. If you have a large batch, blanch them in smaller, successive batches. The blanching time will vary depending on the type and size of the vegetable:
- Leafy Greens (Spinach, Kale, Chard): 30 seconds to 1 minute.
- Tender Vegetables (Asparagus, Green Beans, Snap Peas): 1.5 to 3 minutes.
- Firmer Vegetables (Broccoli, Cauliflower, Carrots, Brussels Sprouts): 3 to 5 minutes.
- Harder Vegetables (Potatoes, Sweet Potatoes for certain uses): 5 to 7 minutes.
Keep a close eye on the vegetables. They should turn a brighter color and become slightly tender but still retain a bite (al dente). Use your timer!
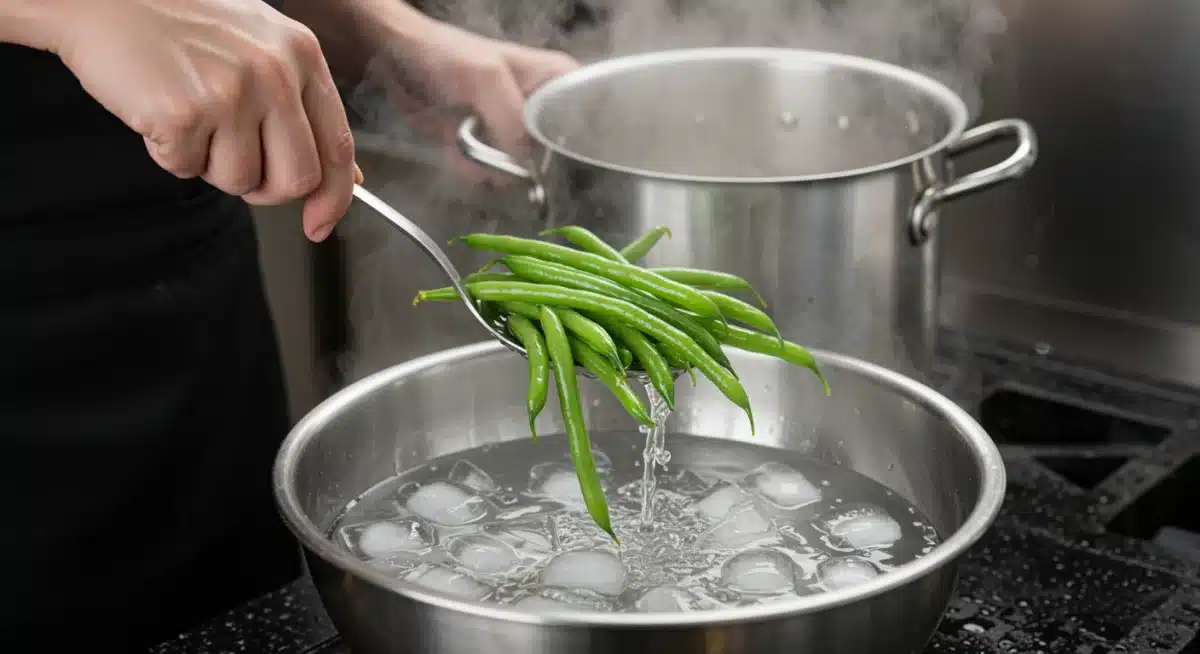
Step 5: Shock the Vegetables Immediately
As soon as the blanching time is up, use your slotted spoon or spider skimmer to quickly transfer the vegetables from the boiling water directly into the prepared ice bath. Make sure they are fully submerged. Stir them gently to ensure even cooling and to prevent them from sticking together. Let them cool in the ice bath for roughly the same amount of time they were blanched, or until they are completely cold to the touch. This rapid cooling is what makes blanching and shocking vegetables so effective.
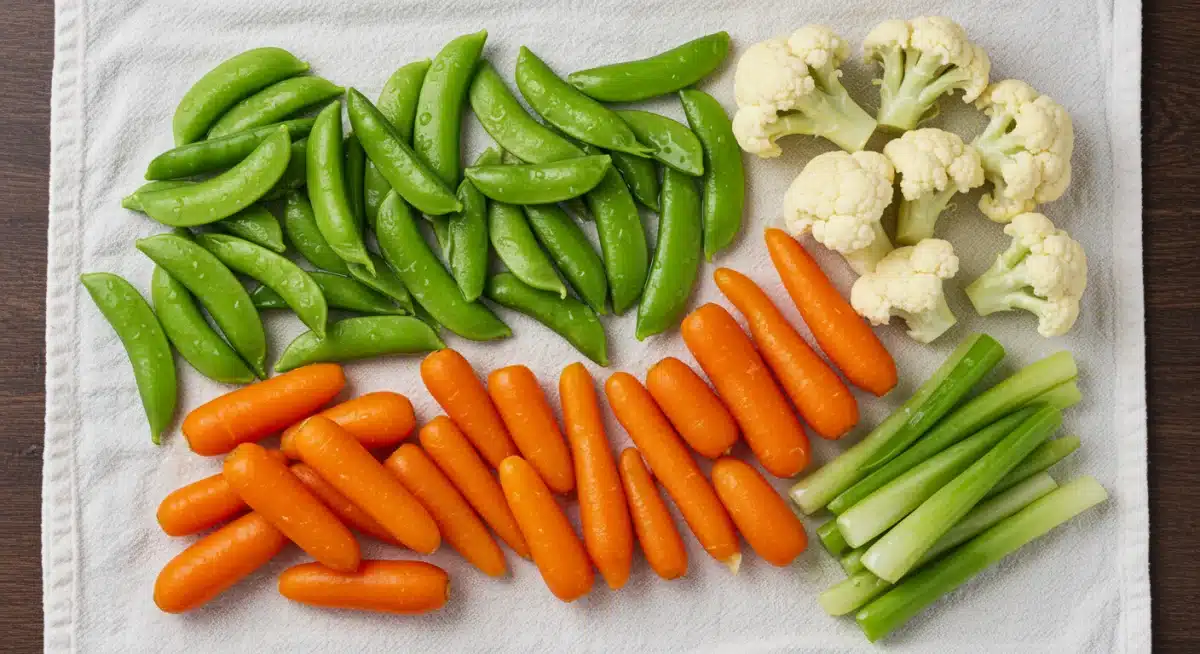
Step 6: Drain and Dry
Once thoroughly chilled, remove the vegetables from the ice bath using a slotted spoon or by pouring them into a colander. It is crucial to dry them thoroughly, especially if you plan to freeze them or use them in a dish where excess moisture would be detrimental (e.g., stir-fries, salads). Lay them out on clean kitchen towels or paper towels and gently pat them dry. Excess moisture can lead to ice crystals during freezing or dilute flavors in your final dish.
Advanced Techniques and Practical Solutions for 2026
Beyond the basics, there are several advanced considerations and practical solutions that can further elevate your blanching and shocking vegetables game in 2026 and beyond. These insights cater to specific needs and common challenges.
Blanching for Freezing and Long-Term Storage
One of the primary uses of blanching and shocking vegetables is for freezing. It’s an indispensable step for preserving the quality of produce for months. The enzyme inactivation achieved through blanching is crucial here. Without it, frozen vegetables would rapidly lose color, texture, and flavor. For freezing, ensure vegetables are perfectly dry before packing them into airtight containers or freezer bags. This prevents freezer burn and maintains quality.
Optimizing Water Usage and Energy Efficiency
In 2026, sustainability is key. To optimize water usage, consider blanching similar vegetables in the same batch of water if their blanching times are compatible. For example, you could blanch green beans and then asparagus, if both require similar brief cooking times. Reusing the same boiling water for multiple batches (within reason) can save energy and water. However, always ensure the water returns to a rolling boil between batches.
The Role of Acid and Alkali in Blanching Water
While generally not necessary, adjusting the pH of your blanching water can sometimes be beneficial. For very green vegetables, a tiny pinch of baking soda (alkali) can help maintain an even brighter green color, but be careful, as too much can make vegetables mushy. Conversely, a splash of lemon juice or vinegar (acid) can help whiter vegetables like cauliflower stay bright white, preventing them from turning grayish.
Blanching for Skin Removal
Blanching and shocking vegetables is the secret to easily peeling certain produce, particularly tomatoes and peaches. For tomatoes, cut a small ‘X’ at the bottom, blanch for 30-60 seconds until the skin starts to curl, then shock. The skin will slip right off. This technique is invaluable for making sauces, purees, and canning.
Troubleshooting Common Blanching Issues
- Mushy Vegetables: Almost always due to over-blanching or insufficient shocking. Reduce blanching time and ensure your ice bath is very cold and plentiful.
- Dull Color: Could be insufficient blanching time (enzymes not fully inactivated) or not enough water for blanching, leading to temperature drop. Also, not shocking immediately or thoroughly enough can cause dullness.
- Lack of Flavor: Ensure you generously salt your blanching water.
- Sticking Together: Overcrowding the pot during blanching or not stirring in the ice bath can cause this. Blanch in smaller batches.
Specific Vegetable Applications and Recipes
Let’s explore how blanching and shocking vegetables applies to some common favorites, offering specific timing and usage tips.
Broccoli and Cauliflower
Blanching these cruciferous vegetables for 2-3 minutes makes them perfectly tender-crisp for salads, stir-fries, or just as a side dish. It also reduces their raw, sometimes sulfurous, taste. Shocking ensures they retain their vibrant green or white color and firm texture.
Green Beans and Asparagus
These slender vegetables benefit immensely from blanching and shocking. Blanch for 1.5-2 minutes for a crisp-tender result. They are then perfect for quick sautés, adding to pasta dishes, or serving cold in salads with a vinaigrette. The process locks in their fresh, spring-like flavor.
Spinach and Other Leafy Greens
Blanching spinach for just 30 seconds to 1 minute significantly reduces its volume, making it easier to incorporate into dishes like quiches, frittatas, or simply as a sautéed side. Shocking stops the cooking and preserves its bright green color, preventing it from turning olive drab.
Carrots and Root Vegetables
For carrots, parsnips, or even potatoes (if you want them slightly pre-cooked for roasting or salads), blanching for 3-5 minutes can give them a head start and a more tender texture. Shocking ensures they don’t become overly soft. This is especially useful for meal prep, as it reduces final cooking time.
Peas (Shelling and Snap)
Fresh peas, both shelling and snap, are fantastic candidates for blanching and shocking vegetables. A quick 1-2 minute blanch for shelling peas brightens their color and slightly sweetens them. Snap peas can be blanched for 1 minute to retain their crunch while intensifying their sweetness, perfect for salads or as a quick snack.
Creative Culinary Applications for Blanched and Shocked Vegetables
The utility of blanching and shocking vegetables extends far beyond simple side dishes or freezing. These techniques are foundational for a myriad of culinary creations:
- Vibrant Salads: Blanched and shocked vegetables add incredible visual appeal and texture to salads. Think blanched asparagus, green beans, or broccoli florets in a grain salad or a vibrant crudité platter.
- Stir-fries and Curries: Pre-blanching harder vegetables for stir-fries and curries ensures they cook evenly and retain their crispness without becoming mushy, while also reducing overall cooking time in the wok.
- Pasta Dishes: Adding blanched vegetables like broccoli rabe or spinach to pasta dishes not only boosts nutrition but also color and texture.
- Freezing for Future Use: As mentioned, blanching is essential for preserving the quality of vegetables destined for the freezer. This allows you to enjoy seasonal produce year-round.
- Garnishes and Plating: The vibrant colors achieved through blanching make vegetables excellent for garnishes, enhancing the aesthetic appeal of any dish.
- Baby Food and Purees: Blanching softens vegetables, making them easier to blend into smooth purees for baby food or sophisticated soups.
Common Mistakes to Avoid When Blanching and Shocking
Even with a clear understanding of the process, it’s easy to make mistakes. Here are some common pitfalls to avoid when blanching and shocking vegetables:
- Overcrowding the Pot: This is arguably the most common mistake. When too many vegetables are added at once, the water temperature drops significantly, leading to longer cooking times and unevenly cooked, often soggy, vegetables. Always blanch in small batches.
- Insufficient Ice Bath: A lukewarm ice bath won’t effectively stop the cooking process. Ensure your ice bath is very cold and contains plenty of ice. Replace ice if it melts too quickly.
- Not Drying Vegetables: Especially important for freezing or dishes where excess water is undesirable. Wet vegetables can lead to freezer burn or watery results in your cooking.
- Guessing Blanching Times: Different vegetables require different times. A timer is your best friend. A few seconds can make the difference between perfectly crisp and mushy.
- Ignoring Salt: Salted water not only seasons the vegetables but also helps raise the boiling point slightly, contributing to more efficient cooking.
- Delaying the Shock: The transfer from boiling water to ice bath must be immediate to prevent carry-over cooking.
The Future of Blanching and Shocking in 2026: Innovations and Trends
As we look forward to 2026, the techniques of blanching and shocking vegetables continue to evolve with new insights and technological advancements. While the core principles remain, there’s a growing emphasis on:
- Energy-Efficient Appliances: Induction cooktops and smart kettles that precisely control temperature are making the blanching process more efficient.
- Vacuum Sealing Integration: For freezing blanched vegetables, advanced home vacuum sealers are becoming more accessible, further extending shelf life and preventing freezer burn.
- Emphasis on Nutrient Retention: Research continues to fine-tune blanching times for specific vegetables to maximize nutrient retention, aligning with the growing demand for highly nutritious food.
- Sous Vide Blanching: While not traditional, some chefs are experimenting with sous vide for a controlled, gentle pre-cooking, followed by a quick chill, offering unique texture benefits.
- Sustainable Sourcing: The focus on local, seasonal produce means home cooks are increasingly blanching their own garden harvests or farmer’s market finds for year-round enjoyment.
These trends highlight that while the methods of blanching and shocking vegetables are ancient, their application remains highly relevant and adaptable to modern culinary practices and environmental consciousness.
Conclusion: Master Your Vegetables with Blanching and Shocking
Mastering the art of blanching and shocking vegetables is a game-changer for any cook. It’s a simple yet powerful set of techniques that unlocks a world of vibrant colors, crisp textures, and preserved nutrients. From preparing vegetables for freezing to enhancing their appeal in everyday meals, these methods are indispensable.
By understanding the science, utilizing the right equipment, and following the step-by-step guidance provided in this article, you are now equipped with 2026 techniques and practical solutions to elevate your culinary skills. Say goodbye to dull, mushy vegetables and hello to perfectly cooked, brilliantly colored produce that will impress and nourish. Embrace blanching and shocking vegetables as your go-to technique for bringing out the best in your garden’s bounty and your market finds. Your palate, and your health, will thank you.


