Mastering Midwestern Pot Roasts: Techniques for Tender Perfection
Anúncios
Deep Dive into Midwestern Pot Roasts: 4 Essential Techniques for Tender Results by 2026
There’s something inherently comforting and deeply satisfying about a perfectly cooked Midwestern Pot Roast. It’s more than just a meal; it’s a culinary hug, a staple of family gatherings, and a testament to the power of slow cooking. In the heartland of America, the pot roast isn’t just food; it’s a tradition, passed down through generations, each family adding their unique touch to this beloved dish. But what truly makes a Midwestern Pot Roast stand out? It’s the unwavering dedication to achieving that melt-in-your-mouth tenderness, combined with a rich, savory gravy that ties all the elements together. As we look towards 2026, the foundational techniques remain timeless, yet there’s always room to refine and perfect our approach.
This comprehensive guide will take you on a journey through the art and science of preparing an exceptional Midwestern Pot Roast. We’ll delve into the critical aspects of selecting the right cut of meat, mastering the searing process, understanding the nuances of braising, and even exploring modern conveniences like slow cookers and pressure cookers without compromising on tradition. Whether you’re a seasoned home cook looking to elevate your game or a novice eager to master this classic, you’ll find invaluable insights here. Our focus will be on four essential techniques that guarantee tender results every single time, ensuring your Midwestern Pot Roasts become legendary.
Anúncios
Technique 1: The Art of Meat Selection & Preparation – Foundation of Tender Midwestern Pot Roasts
The journey to a truly tender Midwestern Pot Roast begins long before you even turn on the stove. It starts with the careful selection and preparation of your meat. This initial step is paramount, as the chosen cut and how it’s handled will dictate much of the final texture and flavor. For a Midwestern Pot Roast, we’re typically looking for cuts that are rich in collagen and connective tissue. These aren’t your prime steaks; rather, they are cuts that thrive under low and slow cooking conditions, transforming from tough to incredibly tender as the collagen breaks down into gelatin.
Anúncios
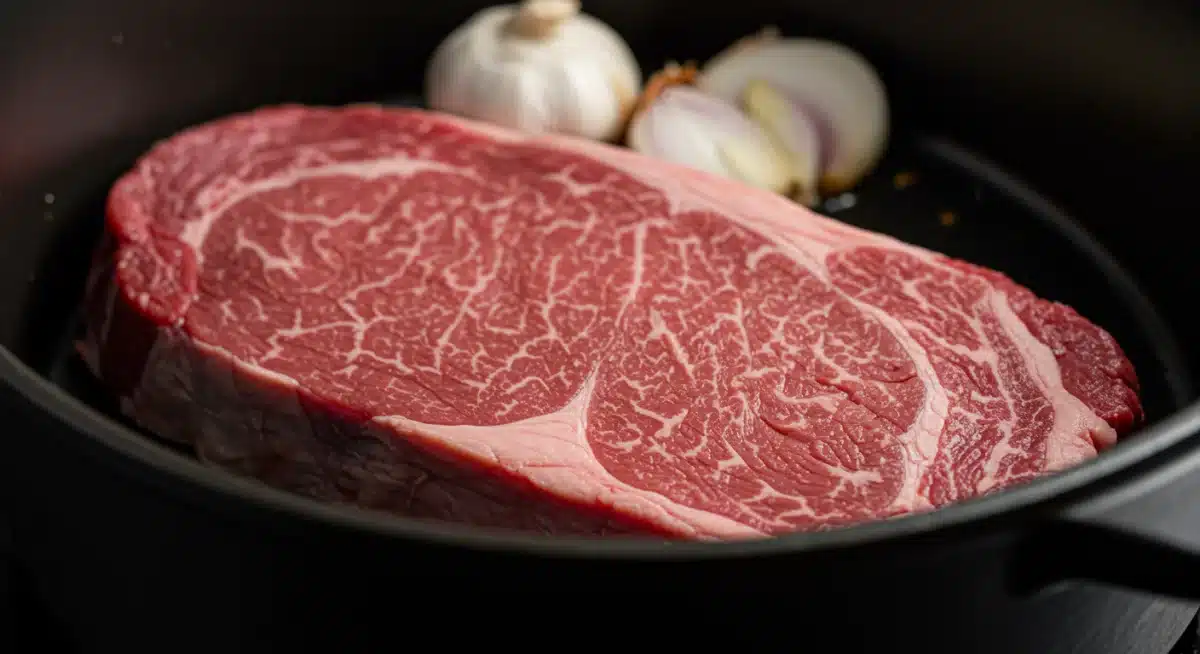
Choosing the Right Cut: The Unsung Heroes
- Chuck Roast: This is the undisputed champion for Midwestern Pot Roasts. Sourced from the shoulder, chuck roast is well-marbled with fat and boasts a good amount of connective tissue. When cooked slowly, this tissue melts away, basting the meat from within and yielding an exceptionally moist and flavorful result. Look for cuts labeled ‘chuck eye roast,’ ‘chuck roll,’ or ‘arm roast.’
- Brisket: While more commonly associated with barbecue, the ‘flat’ or ‘point’ cut of brisket can also make for a fantastic pot roast. It requires a longer cooking time due to its fibrous nature but rewards patience with deep beefy flavor and tenderness.
- Round Roast (Bottom Round or Rump Roast): These leaner cuts from the hindquarters are more economical but require even more careful attention to achieve tenderness. They have less fat and collagen than chuck, so they can dry out if not managed properly. Braising them with ample liquid and covering them tightly is crucial.
When selecting your meat, aim for a piece that is between 3 to 5 pounds. This size allows for sufficient cooking time to break down connective tissues without drying out the exterior. Look for good marbling – those flecks of fat distributed throughout the muscle – as this is a key indicator of flavor and moisture potential.
Initial Preparation: Seasoning and Trimming
Once you’ve chosen your perfect cut, proper preparation is the next critical step. This involves a bit of trimming and generous seasoning.
- Trimming: While some fat is desirable for flavor and moisture, excessive external fat layers can prevent proper searing and sometimes lead to a greasy gravy. Trim off any silver skin or overly thick layers of fat, leaving about a ¼ inch layer if present. This allows for better browning and absorption of seasonings.
- Patting Dry: This step is often overlooked but is absolutely essential for a good sear. Moisture on the surface of the meat will cause it to steam rather than brown. Use paper towels to thoroughly pat the roast dry on all sides.
- Seasoning: For a classic Midwestern Pot Roast, a generous application of coarse salt and freshly ground black pepper is fundamental. Don’t be shy; a large piece of meat can handle a significant amount of seasoning. Some cooks also like to add garlic powder, onion powder, or a blend of dried herbs like thyme and rosemary at this stage. Seasoning well in advance (even an hour or two before cooking, or overnight in the refrigerator) can allow the salt to penetrate deeper into the meat, leading to more flavorful results.
The quality of your initial meat selection and its meticulous preparation set the stage for all the deliciousness to come. By understanding the characteristics of different cuts and dedicating time to proper seasoning and trimming, you’ve already taken a significant stride towards a truly tender and flavorful Midwestern Pot Roast.
Technique 2: The Art of Searing – Building Flavor for Midwestern Pot Roasts
After carefully selecting and preparing your meat, the next crucial technique for an outstanding Midwestern Pot Roast is searing. Searing isn’t just about achieving a beautiful golden-brown crust; it’s about developing deep, complex flavors through the Maillard reaction. This chemical process transforms sugars and amino acids on the surface of the meat, creating hundreds of new flavor compounds that are impossible to achieve through braising alone. Skipping this step is a common mistake that leads to a less flavorful pot roast.
The Searing Process: A Step-by-Step Guide
- Choose the Right Pan: A heavy-bottomed pan that retains heat well is essential. A Dutch oven or a large cast-iron skillet is ideal. These pans ensure even heat distribution and help maintain a consistent temperature, which is crucial for effective searing.
- Heat the Pan Properly: Place your pan over medium-high to high heat. Add a high smoke point oil, such as canola, grapeseed, or vegetable oil, just enough to thinly coat the bottom of the pan. Let the oil get shimmering hot – almost to the point of smoking. This high heat is necessary to achieve a quick, intense sear without overcooking the interior of the meat.
- Sear in Batches (if necessary): If you have a very large roast, it’s better to cut it into 2-3 pieces and sear them in batches. Crowding the pan will lower the temperature, causing the meat to steam rather than sear, resulting in a pale, grey exterior and a lack of flavor development. Give each piece ample space.
- Patience is Key: Place the seasoned and patted-dry Midwestern Pot Roast into the hot oil. Resist the urge to move it for several minutes. Allow a deep, rich brown crust to form on one side before carefully turning it with tongs. This typically takes 4-6 minutes per side. You’ll want to sear all visible sides of the roast. Don’t forget the ends!
- Deglazing (Optional but Recommended): After searing the meat and removing it from the pan, you’ll notice browned bits – known as ‘fond’ – stuck to the bottom of the pan. These are packed with flavor. You can deglaze the pan at this point by adding a splash of liquid (like red wine, beef broth, or even water) and scraping up the fond with a wooden spoon. This flavorful liquid can then be added back to your pot roast during the braising stage.
Why Searing is Non-Negotiable for Midwestern Pot Roasts
The Maillard reaction, which occurs during searing, creates a depth of flavor that cannot be replicated by any other cooking method. It adds savory, toasted, and slightly nutty notes that are quintessential to a truly great Midwestern Pot Roast. Without searing, the roast would taste ‘flat’ or ‘boiled,’ lacking the complexity that makes this dish so beloved. Think of searing as the first layer of flavor, the foundation upon which the rest of the dish is built. It seals in some juices (though this is a debated point, the primary benefit is flavor development) and creates a textural contrast that enhances the overall eating experience.
By mastering the art of searing, you’re not just browning meat; you’re unlocking a world of flavor that will elevate your Midwestern Pot Roast from good to extraordinary. This technique, combined with proper meat selection, sets the stage for the slow, gentle cooking that will render your roast unbelievably tender.
Technique 3: The Magic of Low and Slow Braising – Achieving Ultimate Tenderness
With your Midwestern Pot Roast perfectly seared and aromatic vegetables softened, we move to the heart of what makes this dish so special: low and slow braising. This technique is the secret to transforming tough cuts of meat into fork-tender masterpieces. Braising involves cooking meat partially submerged in liquid, in a covered vessel, over a prolonged period at a low temperature. It’s a method that celebrates patience and yields incredibly flavorful and succulent results.
Understanding the Science Behind Braising
The magic of braising lies in its ability to break down collagen and connective tissues. These tough proteins, abundant in cuts like chuck roast, are what make the meat chewy when cooked quickly. However, when subjected to moist heat over several hours, they slowly dissolve and convert into gelatin. This gelatin then melts into the cooking liquid, basting the meat from within, keeping it moist, and enriching the surrounding sauce. The result is meat that literally falls apart with the slightest touch, imbued with the flavors of the braising liquid and aromatics.
Key Elements of Effective Braising for Midwestern Pot Roasts
- The Braising Liquid: This is where much of the flavor profile of your Midwestern Pot Roast comes from. A classic braising liquid typically includes:
- Beef Broth/Stock: High-quality beef broth or stock is essential for a rich, savory base. You can enhance its depth with a splash of red wine or a dark beer for extra complexity.
- Tomato Paste/Crushed Tomatoes: A small amount of tomato paste or crushed tomatoes adds acidity, which helps to tenderize the meat and provides a subtle tangy sweetness that balances the richness.
- Aromatics: Alongside your base vegetables (onions, carrots, celery), consider adding garlic, bay leaves, fresh thyme, or rosemary sprigs directly to the braising liquid.
- Acidity: Beyond tomatoes, a splash of Worcestershire sauce or a touch of balsamic vinegar can further aid in tenderizing and deepening flavors.
- The Quantity of Liquid: The roast should be partially submerged, typically about one-third to halfway up the sides. Too much liquid will boil the meat, leading to a less concentrated flavor, while too little could cause it to dry out.
- The Covered Vessel: A heavy-lidded Dutch oven is the ideal vessel for braising. Its tight-fitting lid traps steam and moisture, creating a self-basting environment. If using a roasting pan, ensure it’s tightly sealed with foil.
- Low Temperature, Long Time: This is the ‘low and slow’ part. For oven braising, maintain a temperature between 300°F and 325°F (150°C-160°C). For stovetop braising, keep the heat very low, just above a simmer. The cooking time will vary depending on the size and cut of meat, but expect anywhere from 2.5 to 4 hours, or even longer for larger, tougher cuts. The goal is not a specific time, but achieving fork-tenderness.
Monitoring and Resting
During the braising process, it’s a good idea to check the liquid level periodically, especially if cooking for an extended period. If it’s getting too low, add more warm broth. The roast is done when it can be easily shredded with a fork, or when an internal thermometer reads around 200-205°F (93-96°C). This temperature indicates that the collagen has fully broken down.
Once cooked, resist the urge to immediately shred or slice the meat. Remove the Midwestern Pot Roast from the liquid, tent it loosely with foil, and let it rest for at least 15-20 minutes. This resting period allows the juices to redistribute throughout the meat, ensuring maximum moisture and tenderness. The braising liquid can then be strained and reduced to make a rich, flavorful gravy.
Mastering low and slow braising is the cornerstone of any truly exceptional Midwestern Pot Roast. It’s a technique that rewards patience with unparalleled tenderness and a depth of flavor that makes every bite a comforting experience.
Technique 4: Integrating Root Vegetables & Finishing Touches – The Complete Midwestern Pot Roast Experience
A Midwestern Pot Roast isn’t complete without its accompanying root vegetables, which absorb the rich flavors of the braising liquid and complement the tender meat beautifully. This final technique focuses on timing, proper vegetable selection, and those crucial finishing touches that elevate the entire dish from a simple meal to a culinary event.
Timing is Everything: Adding Your Vegetables
The key to perfectly cooked vegetables – tender but not mushy – is knowing when to add them to the braising pot. Adding them too early will result in overcooked, disintegrated vegetables, while adding them too late will leave them undercooked. For most Midwestern Pot Roasts:
- Onions & Celery: These aromatics are typically added and sautéed after searing the meat, before adding the braising liquid. They provide a flavorful base from the start.
- Carrots & Potatoes: These heartier root vegetables should be added during the last 1 to 1.5 hours of cooking. Cut them into substantial, uniform chunks (about 1.5-2 inches) to ensure they cook evenly and don’t turn to mush. If you prefer, you can also add parsnips or turnips for additional flavor and texture.
- Peas or Green Beans: If you desire lighter, quicker-cooking vegetables, add them in the last 15-20 minutes of cooking, or even steam them separately and add them just before serving to maintain their vibrant color and crisp-tender texture.
The Art of the Gravy: The Unifying Element
No Midwestern Pot Roast is complete without a rich, savory gravy made from the pan drippings. This is where all the accumulated flavors of the meat, aromatics, and braising liquid truly shine. After removing the cooked roast and vegetables from the pot:
- Skim the Fat: Use a ladle or a fat separator to remove excess fat from the braising liquid. A little fat is fine for flavor, but too much can make the gravy greasy.
- Strain the Liquid: For a smooth gravy, strain the liquid through a fine-mesh sieve, pressing down on any solids (like softened onions or herbs) to extract maximum flavor. Discard the solids.
- Thicken the Gravy: Return the strained liquid to the pot and bring it to a simmer over medium heat. You can thicken it using a ‘slurry’ (equal parts cornstarch or flour mixed with cold water or broth) or a ‘roux’ (equal parts butter and flour cooked together). Whisk the chosen thickener into the simmering liquid gradually until your desired consistency is reached. Cook for a few minutes to eliminate any starchy taste.
- Adjust Seasoning: Taste the gravy and adjust seasonings as needed. It may benefit from a pinch more salt, pepper, a dash of Worcestershire, or even a tiny amount of sugar to balance the flavors.
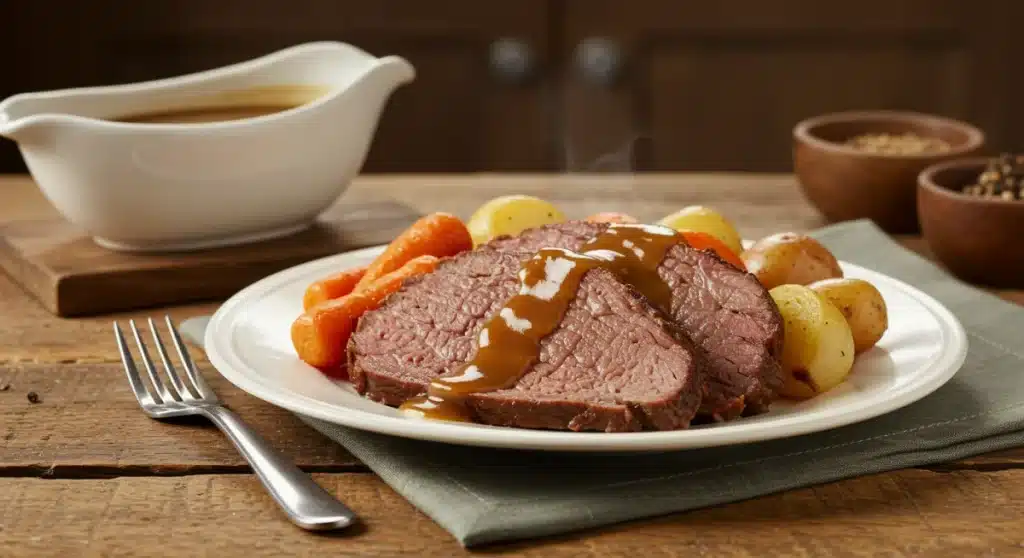
Serving Your Midwestern Pot Roast
Once your roast is rested, your vegetables are tender, and your gravy is perfected, it’s time to serve. You can slice the roast against the grain (if it’s still holding together) or, more commonly for a truly tender Midwestern Pot Roast, gently shred it into large chunks. Arrange the meat and vegetables on a large platter, and generously spoon the rich gravy over everything. A sprinkle of fresh parsley or chives can add a touch of color and freshness.
This final stage of integrating vegetables and crafting the perfect gravy brings all the elements of your Midwestern Pot Roast together, creating a harmonious and deeply satisfying meal that embodies comfort and tradition. These finishing touches are what transform a good pot roast into an unforgettable one, making it a dish that will be cherished and requested for years to come.
Beyond the Basics: Tips for Elevating Your Midwestern Pot Roasts
While the four essential techniques – meat selection, searing, braising, and integrating vegetables/gravy – form the bedrock of a perfect Midwestern Pot Roast, there are always ways to refine and personalize your dish. These advanced tips and considerations can help you achieve even greater depths of flavor and tenderness, ensuring your pot roast stands out as a true culinary triumph.
Experimenting with Braising Liquids
Don’t be afraid to venture beyond traditional beef broth. The braising liquid is a powerful tool for flavor infusion:
- Red Wine: A dry red wine (like Cabernet Sauvignon or Merlot) adds wonderful depth and complexity. It’s often used to deglaze the pan after searing.
- Dark Beer: Stouts or porters can impart a rich, malty flavor that pairs exceptionally well with beef.
- Cider or Apple Juice: For a subtle sweetness and fruity tang, some cooks incorporate a small amount of apple cider or juice, especially if using a slightly leaner cut.
- Coffee: A small amount of strong brewed coffee can deepen the savory notes of the beef without making the dish taste like coffee. It’s a secret ingredient for many chefs.
Remember to taste your braising liquid before adding it to the pot. It should be pleasantly seasoned, as its flavors will concentrate during cooking.
Herbs and Spices: Beyond Salt and Pepper
While classic Midwestern Pot Roasts often rely on simple seasonings, a thoughtful addition of herbs and spices can elevate the profile:
- Fresh Herbs: Rosemary, thyme, and bay leaves are classic choices. Tie them into a ‘bouquet garni’ for easy removal.
- Smoked Paprika: Adds a beautiful color and a subtle smoky flavor.
- Mustard Powder: A teaspoon can enhance the savory notes of the beef.
- Juniper Berries: A few crushed berries can add a unique, slightly piney flavor that complements rich meats.
- Whole Spices: A few whole peppercorns or even a star anise (use sparingly!) can add unexpected layers of aroma.
The Role of Acidity and Umami Enhancers
Acidity helps tenderize meat and brightens rich flavors, while umami adds depth:
- Worcestershire Sauce: A staple for beef, it’s packed with umami.
- Balsamic Vinegar: A splash can add a lovely sweet-sour balance.
- Soy Sauce: A small amount can boost umami without making the dish taste Asian.
- Anchovy Paste: A tiny bit (you won’t taste fish) can add incredible savory depth – a true chef’s secret.
- Mushrooms: Sliced mushrooms added during the last hour of cooking add earthy umami notes.
Modern Conveniences: Slow Cookers and Pressure Cookers
While a Dutch oven in the oven is traditional, modern appliances offer convenient alternatives:
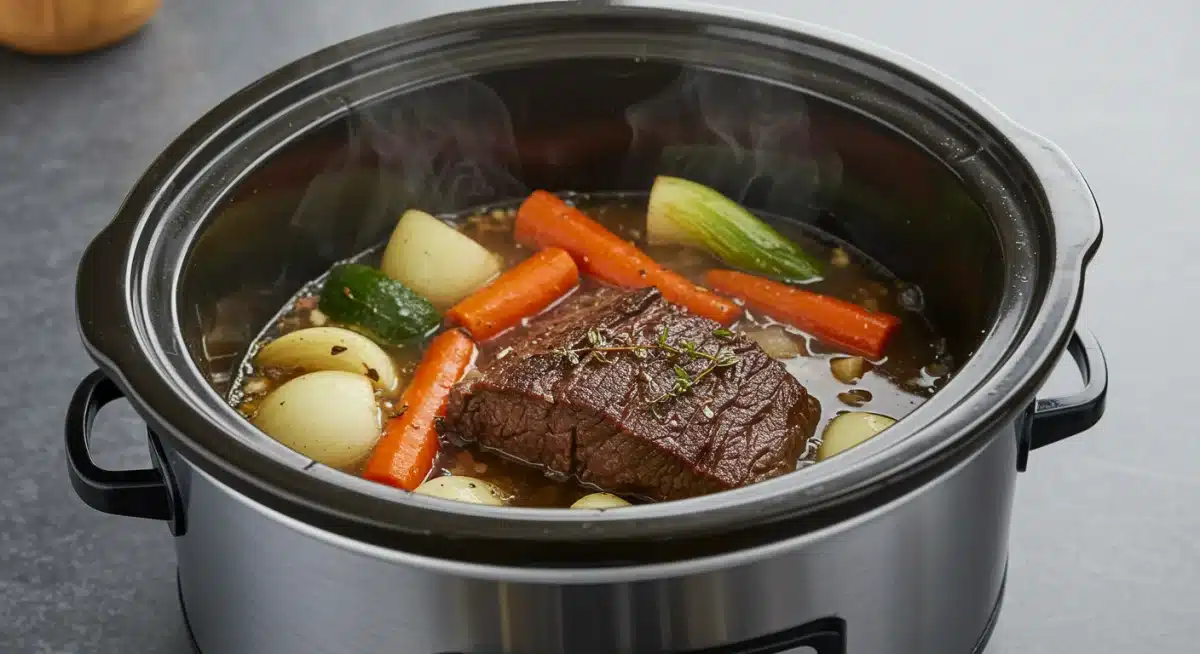
- Slow Cooker: Ideal for ‘set it and forget it’ cooking. Perform the searing step on the stovetop first for optimal flavor, then transfer everything to the slow cooker. Cook on low for 6-8 hours or high for 3-4 hours, until fork-tender. Adjust liquid amounts as slow cookers retain more moisture.
- Pressure Cooker/Instant Pot: Drastically reduces cooking time while still achieving incredible tenderness. Searing can often be done directly in the pot. Cook times for chuck roast are typically 60-90 minutes at high pressure, followed by a natural release. This method is excellent for busy weeknights when you crave a Midwestern Pot Roast.
Resting and Reheating – Enhancing Flavor and Texture
The importance of resting the meat after cooking cannot be overstated. It allows juices to redistribute, resulting in a more tender and moist roast. For even better flavor, many chefs advocate for making pot roast a day ahead. Reheating allows the flavors to meld and deepen. Gently reheat the shredded or sliced meat in its gravy on the stovetop or in the oven until warmed through.
By incorporating these advanced tips and embracing modern cooking methods alongside traditional techniques, you can continuously refine your Midwestern Pot Roast, making it a dish that is not only tender and flavorful but also uniquely yours. The journey of mastering this classic comfort food is an ongoing one, filled with delicious discoveries.
Conclusion: The Enduring Appeal of Midwestern Pot Roasts
The Midwestern Pot Roast is more than just a recipe; it’s a culinary institution, a symbol of comfort, tradition, and hearty home cooking. Its enduring appeal lies in its ability to transform humble ingredients into a meal that is deeply satisfying, incredibly flavorful, and, above all, wonderfully tender. By focusing on the four essential techniques we’ve explored – meticulous meat selection and preparation, the art of searing for flavor development, the magic of low and slow braising for ultimate tenderness, and the thoughtful integration of vegetables and a rich gravy – you are well-equipped to create a pot roast that will be remembered and requested for years to come.
As we look towards 2026 and beyond, the core principles of cooking a truly exceptional Midwestern Pot Roast remain timeless. It’s about respecting the ingredients, understanding the science behind the cooking processes, and, perhaps most importantly, having patience. The slow simmer, the gentle cooking, and the anticipation of that fork-tender bite are all part of the experience. Whether you choose a classic Dutch oven, the convenience of a slow cooker, or the speed of a pressure cooker, the dedication to these fundamental techniques will ensure consistent, delicious results.
The beauty of the Midwestern Pot Roast also lies in its versatility. It’s a dish that can be adapted to personal tastes, with endless possibilities for variations in braising liquids, herbs, and spices. Yet, at its heart, it remains a celebration of simple, wholesome ingredients cooked with care and love. So, gather your ingredients, embrace the process, and prepare to delight your family and friends with a Midwestern Pot Roast that exemplifies tender perfection. Happy cooking!


